
A complete step-by-step guide to deploying a secure and optimized WordPress website using Ubuntu 26.04, Nginx, PHP-FPM, and MariaDB.
Table of Contents
Introduction
What is WordPress?
If you’ve spent any time on the web, you’ve almost certainly visited a WordPress site without knowing it. WordPress is a free, open source content management system (CMS) that enables you to create and manage a website without having to code everything from scratch. It began as a blogging tool, but now it powers everything from personal blogs to full-blown e-commerce stores and corporate sites, mostly thanks to its huge library of plugins and themes and the massive community behind it.
Why Use Ubuntu + Nginx?
There are many options for hosting WordPress, but Ubuntu with Nginx has become a favourite among developers and sysadmins for good reason. Ubuntu is stable, well-documented, and its LTS (Long-Term Support) releases mean you’re not always chasing updates just to stay secure. For now, Nginx has pretty much replaced Apache as the default web server on new installs; it’s leaner, faster under load, and plays nicely with modern tooling like Let’s Encrypt.
Why is this stack preferred?
There are a few reasons why you keep seeing this combination in production environments:
- Lightweight web server: Nginx is event-driven, so it doesn’t spin up a new process for each new connection like older servers. This makes it a sipper of resources, even on tiny VPS instances.
- Better performance: It handles concurrent connections gracefully, which really counts when your site gets a sudden spike in visitors.
- Easy SSL integration: Tools like Certbot were pretty much built with Nginx in mind, so getting a free, auto-renewing SSL certificate is a five-minute job.
- Production-ready environment: None of this is experimental. Nginx, MariaDB and PHP-FPM combined are one of the most battle-proven stacks in web hosting today.
WordPress powers millions of websites worldwide. In this guide, we will go through installing it on Ubuntu 26.04. We will use Nginx as the web server, MariaDB as the database, and PHP-FPM to manage dynamic PHP processing. By the end, you will have a working, secure WordPress site running on your own server.
Prerequisites
Server Requirements
Before getting started, it’s a good idea to check if your server can handle what we are about to install. Here’s what you’ll need:
| Component | Requirement |
| OS (Operating System) | Ubuntu 26.04 (LTS) |
| RAM | Minimum 1 GB |
| Storage | 10 GB+ |
| Web Server | Nginx |
| Database | MariaDB |
| PHP | PHP 8.x |
| Access | root/sudo SSH |
One more thing before we start. You will need SSH access to your server with root or sudo privileges. Nearly every command below requires these elevated permissions. If you can already SSH in and run sudo commands, you’re all set.
Update Ubuntu Server
Update System Packages
Before installing any software on a fresh server, it is always a good idea to update the system packages first. This ensures you are working with the latest available versions and reduces the risk of running outdated or vulnerable software.
Run the following commands:
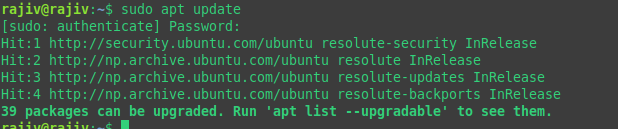
sudo apt update
sudo apt upgrade -y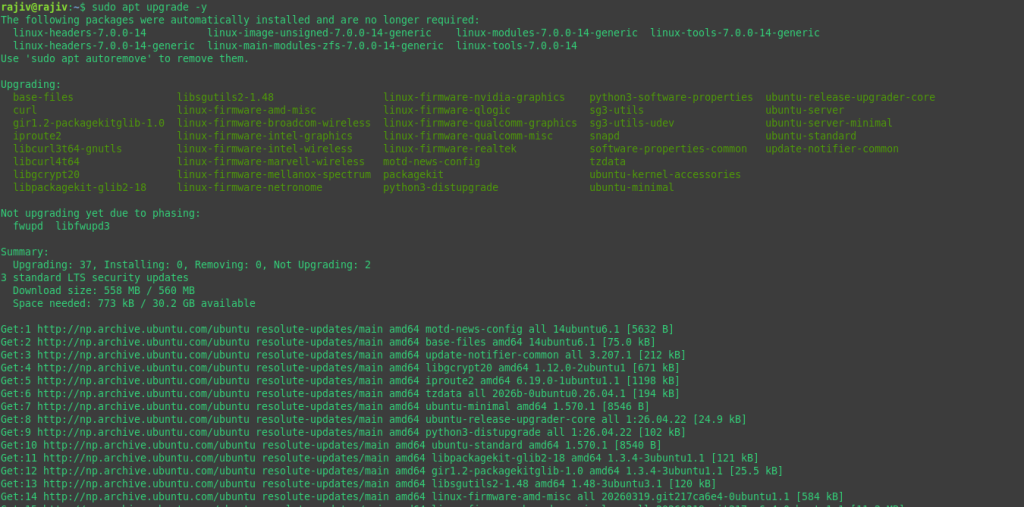
Here is what each command does:
- apt update does not install or upgrade anything. It simply refreshes the local package index by checking your configured repositories and retrieving information about available packages and their latest versions.
- apt upgrade is the command that actually installs the available updates, upgrading your existing packages to their newer versions.
Keeping your server updated is an important first step when preparing a secure and reliable web hosting environment.
Install Nginx Web Server
Install and Configure Nginx
Now that your system packages are up to date, the next step is to install Nginx.
Run the following command:
sudo apt install nginx -y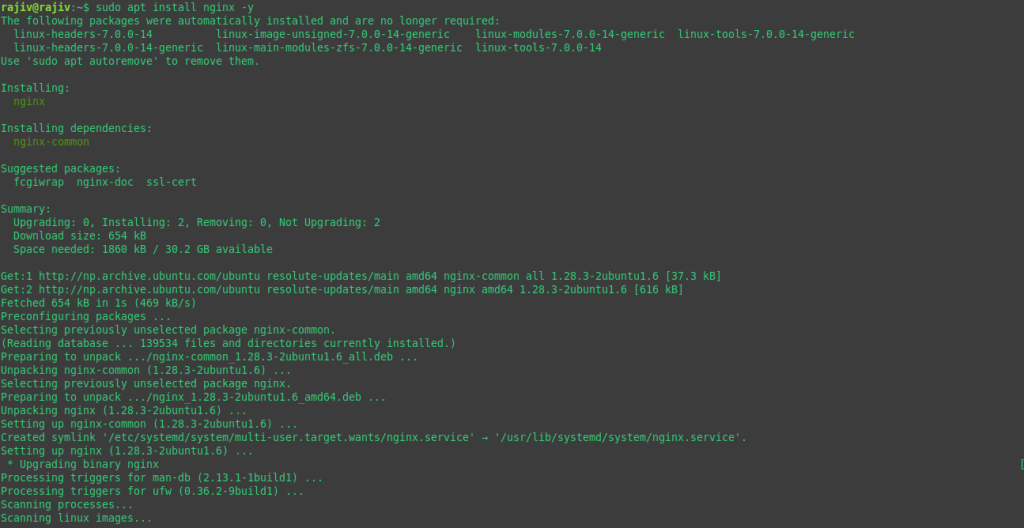
Once the installation is complete, verify that Nginx is running correctly:
sudo systemctl status nginx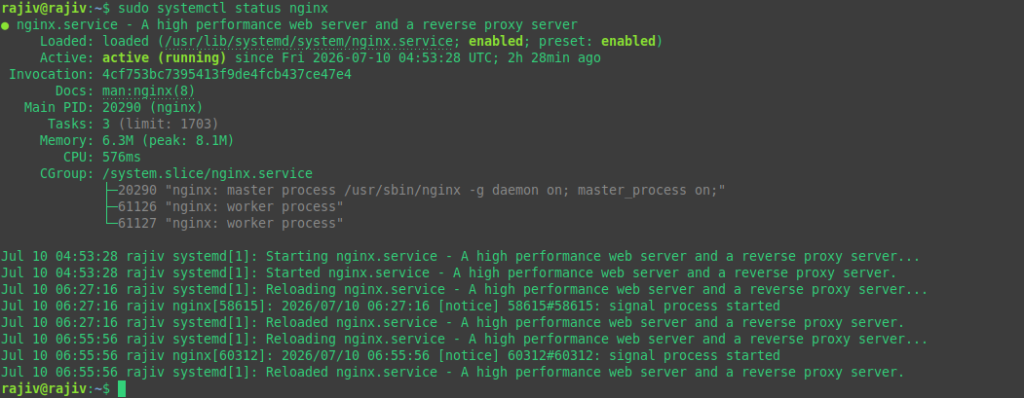
If the service is active and running, Nginx has been installed successfully.
To make sure Nginx starts automatically whenever your server reboots, enable it with:
sudo systemctl enable nginx
This ensures your web server will automatically come back online after a system restart without requiring manual intervention.
Verification
The easiest way to check if Nginx has been installed correctly is to open your web browser and enter your server’s IP address:
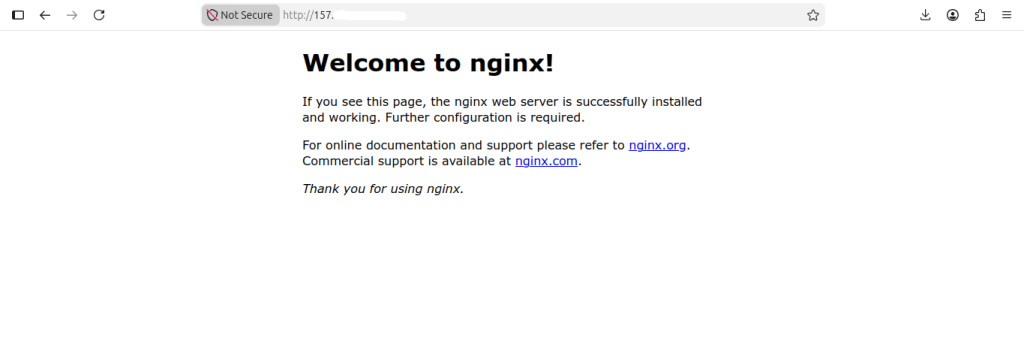
If everything is working properly, you should see the default “Welcome to nginx!” page. This confirms that Nginx is running successfully and your server is reachable from the internet.
Install MariaDB Database Server
Install MariaDB
Before WordPress can run, it needs a database to store everything from posts and pages to user accounts and site settings. In this guide, we’ll use MariaDB, a fast and reliable open-source database server that is fully compatible with WordPress.
Install MariaDB by running:
sudo apt install mariadb-server -y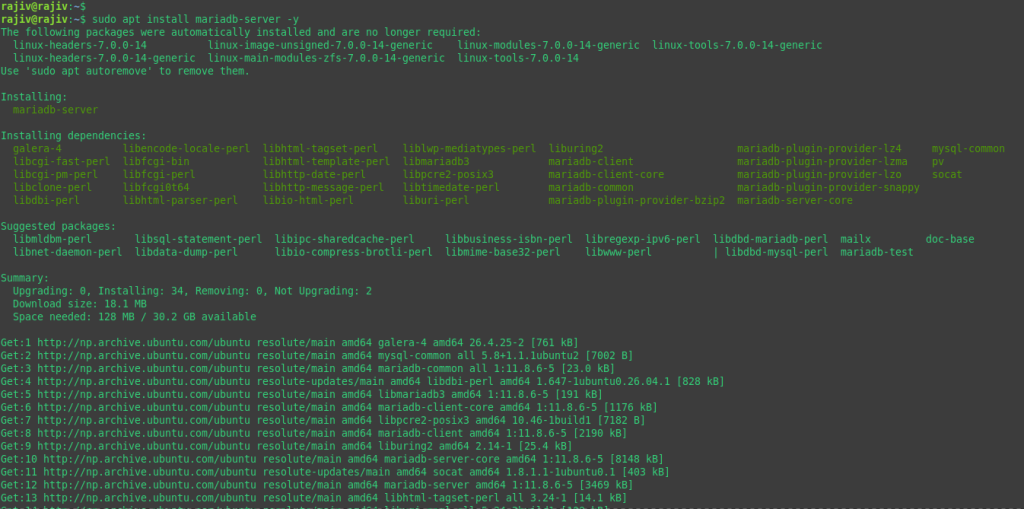
Once the installation is complete, it’s recommended to secure your MariaDB server before moving on. MariaDB includes a built-in security script that helps you remove insecure default settings and improve the overall security of your database server.
Run the following command:
sudo mariadb-secure-installation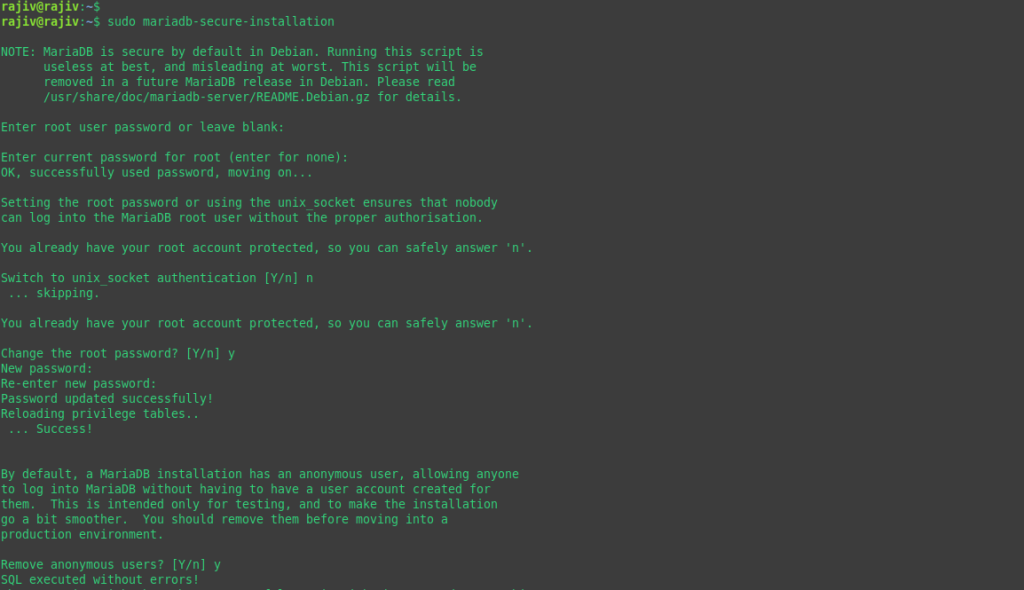
The security wizard will guide you through several configuration options, such as setting a root password (if applicable), removing anonymous users, disabling remote root logins, deleting the test database, and reloading the privilege tables. For most production environments, accepting the recommended security options is the best choice.
Create WordPress Database
Create Database and User
Before installing WordPress, you’ll need to create a dedicated database and database user. Using a separate account instead of the MariaDB root user is considered a security best practice, as it limits the permissions available to your WordPress installation.
First, log in to the MariaDB shell:
sudo mariadb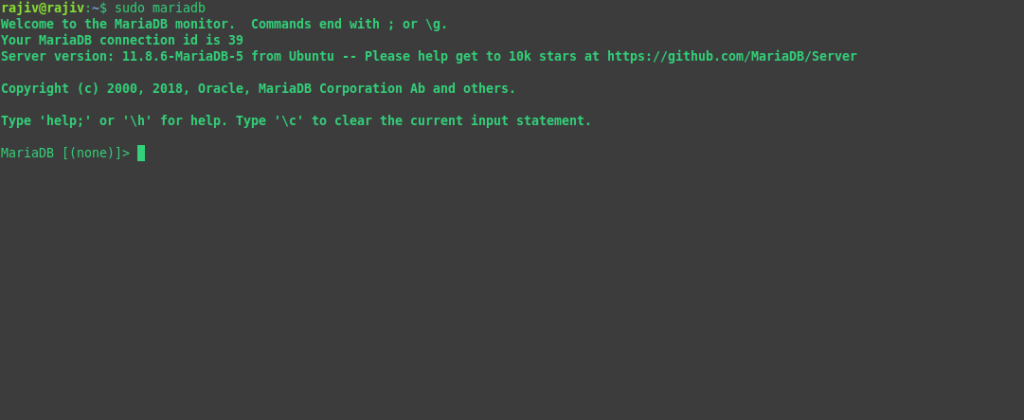
Once you’re connected, run the following SQL commands:
CREATE DATABASE wordpress;

CREATE USER 'wpuser'@'localhost'
IDENTIFIED BY 'StrongPassword123!';

GRANT ALL PRIVILEGES
ON wordpress.*
TO 'wpuser'@'localhost';

FLUSH PRIVILEGES;

EXIT;
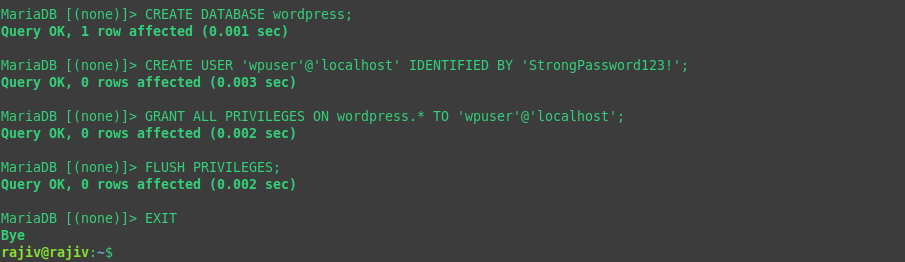
What these commands do
- CREATE DATABASE wordpress; creates a new database where WordPress will store all of its content, including posts, pages, comments, settings, themes, and plugin data.
- CREATE USER ‘wpuser’@’localhost’; creates a dedicated database user that WordPress will use to connect to MariaDB. Restricting the user to localhost means it can only connect from the local server.
- GRANT ALL PRIVILEGES ON wordpress.* gives the new user full control over the wordpress database, while preventing access to any other databases on the server.
- FLUSH PRIVILEGES; reloads the privilege tables so the new permissions take effect immediately.
- EXIT; closes the MariaDB shell and returns you to the Linux terminal.
Note: Replace StrongPassword123! with a unique, complex password of your own. Avoid using simple or predictable passwords, especially on production servers.
Install PHP and Required Extensions
Before WordPress can serve dynamic pages, your server needs PHP and the required extensions. Since Nginx doesn’t process PHP files on its own, it relies on PHP-FPM (FastCGI Process Manager) to execute PHP code efficiently.
Install PHP-FPM
Install PHP-FPM along with the extensions commonly required by WordPress:
sudo apt install php-fpm php-mysql php-cli php-curl php-gd php-mbstring php-xml php-zip unzip -y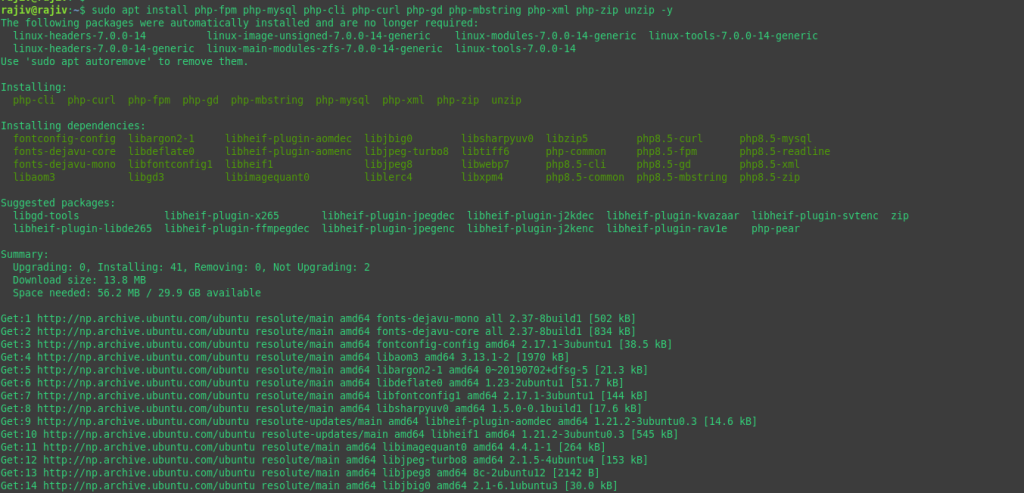
This command installs PHP-FPM, the PHP command-line interface, and several extensions that enable WordPress and its plugins to function correctly.
Package Overview
| Package | Purpose |
| php-fpm | Processes PHP files and works with Nginx to serve dynamic web pages. |
| php-mysql | Allows PHP applications, including WordPress, to communicate with MariaDB or MySQL databases |
| php-cli | Provides the PHP command-line interface for running PHP scripts and administrative tools from the terminal. |
| php-curl | Enables PHP to make HTTP and HTTPS requests, which WordPress uses for updates, API integrations, and many plugins. |
| php-gd | Adds image processing capabilities, such as resizing, cropping, and generating thumbnails. |
| php-mbstring | Provides multibyte string support, allowing WordPress to correctly handle Unicode and multilingual text. |
| php-xml | Enables XML parsing and processing, which is required by WordPress and many plugins. |
| php-zip | Allows WordPress to extract and create ZIP archives, commonly used when installing or updating themes and plugins. |
| unzip | Command-line utility used to extract compressed ZIP files, including the WordPress installation package. |
Once these packages are installed, your server will have everything needed to run WordPress with Nginx.
Download WordPress
With your web server, database, and PHP environment ready, the next step is to download the latest version of WordPress and place it in your website’s document root.
Download and Extract WordPress
With your web server, database, and PHP environment ready, the next step is to download the latest version of WordPress and place it in your website’s document root.
Start by navigating to the web root directory:
cd /var/www/
Download the latest WordPress release directly from the official WordPress website:
sudo wget https://wordpress.org/latest.zip
Once the download is complete, extract the archive:
unzip latest.zip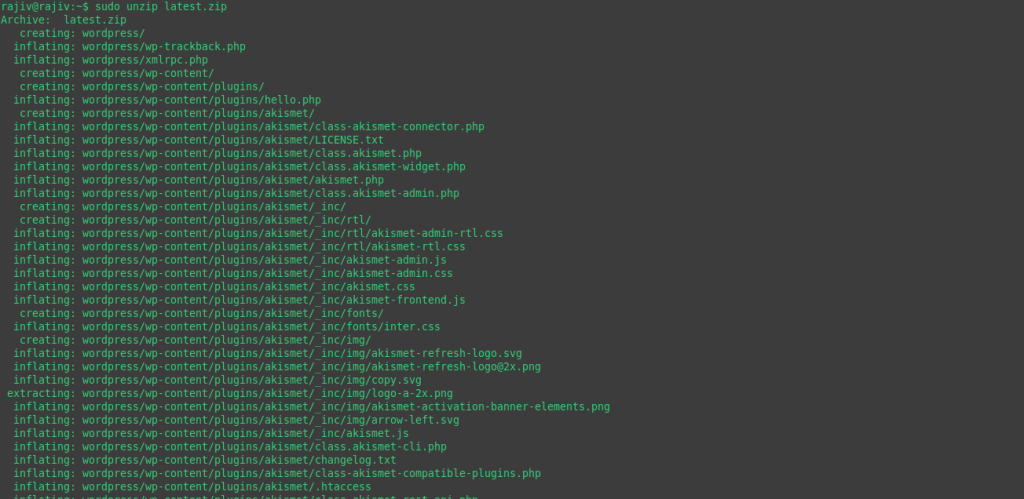
This creates a directory named wordpress containing all of the WordPress installation files.
Finally, move the extracted directory to your website’s document root. Replace example.com with your actual domain name:
sudo mv wordpress /var/www/example.com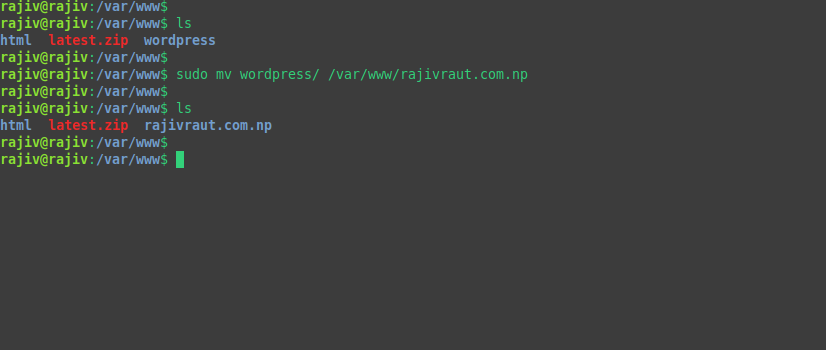
After completing these steps, your WordPress files will be located in /var/www/example.com, ready to be configured with Nginx and connected to your database.
Configure File Permissions
Set the Correct Permissions
Setting the correct ownership and file permissions is an important step in securing your WordPress installation. Incorrect permissions can lead to installation issues, plugin update failures, or even security vulnerabilities.
Since both Nginx and PHP-FPM run as the www-data user on Ubuntu, the WordPress files should be owned by that user.
Run the following commands:
sudo chown -R www-data:www-data /var/www/example.com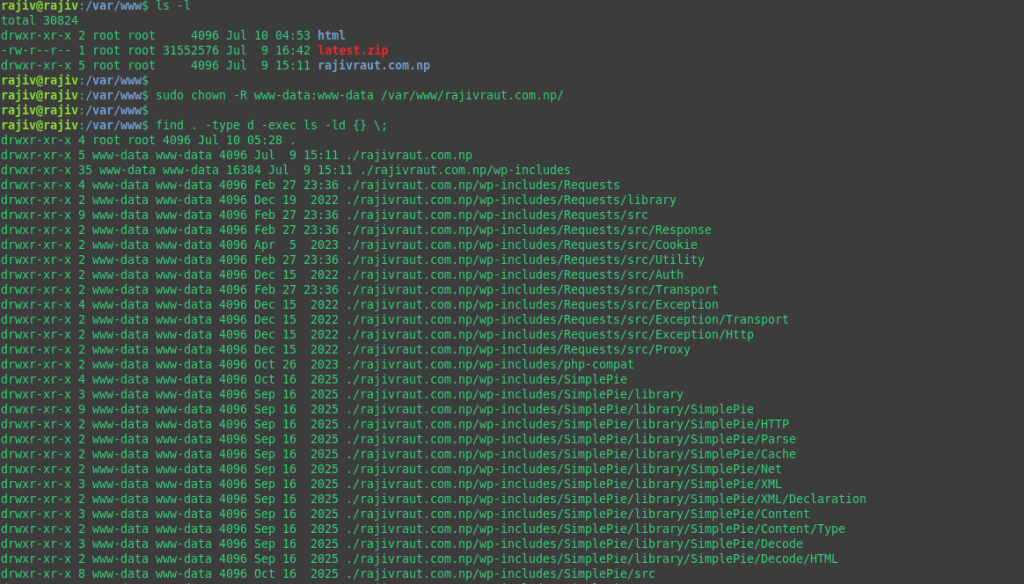
sudo find /var/www/example.com -type d -exec chmod 755 {} \;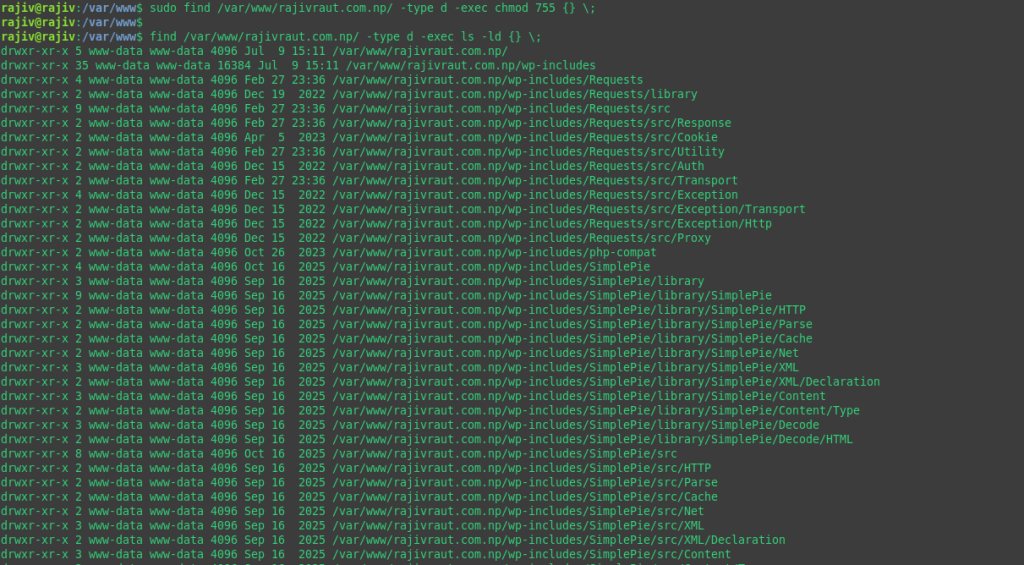
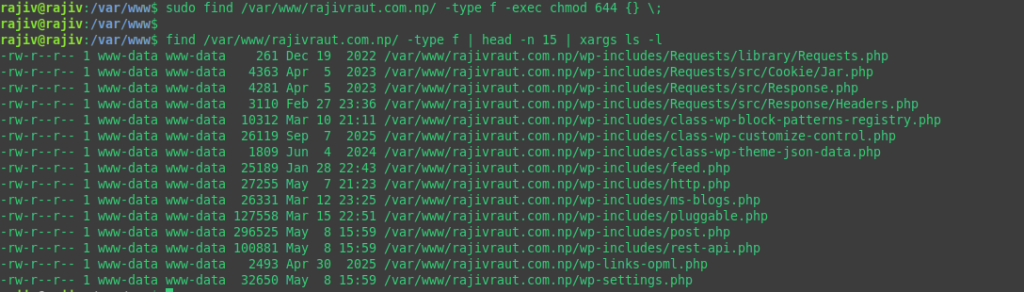
sudo find /var/www/example.com -type f -exec chmod 644 {} \;
What these commands do
- chown -R www-data:www-data changes the ownership of all WordPress files and directories to the www-data user and group. This allows Nginx and PHP-FPM to access the files and enables WordPress features such as media uploads, plugin installations, and updates.
- find … -type d -exec chmod 755 sets all directories to 755 permissions. This allows the owner to read, write, and access the directories, while everyone else can read and traverse them without being able to modify their contents.
- find … -type f -exec chmod 644 sets all files to 644 permissions. This allows the owner to read and modify the files, while others can only read them. Since regular files do not need to be executable, this is the recommended and more secure default.
Using these permission settings helps ensure that WordPress functions correctly while reducing the risk of unauthorized modifications to your website files.
Configure Nginx Virtual Host
Configure the Nginx Server Block
With WordPress in place, the next step is to configure Nginx so it knows how to serve your website. In Nginx, this is done using a server block (similar to a virtual host in Apache).
Create a new server block configuration file for your domain:
sudo vim /etc/nginx/sites-available/example.comReplace example.com with your actual domain name, then add the following configuration:
server {
    listen 80;

    server_name example.com www.example.com;

    root /var/www/example.com;
    index index.php index.html;

    location / {
        try_files $uri $uri/ /index.php?$args;
    }

    location ~ \.php$ {
        include snippets/fastcgi-php.conf;
        fastcgi_pass unix:/run/php/php8.x-fpm.sock;
    }

    location ~ /\.ht {
        deny all;
    }
}
Note: The PHP-FPM socket name depends on the version of PHP installed on your server. Before finalizing your Nginx configuration, verify the correct socket by running:
ls /run/php/You should see output similar to:
php8.5-fpm.pid
php8.5-fpm.sock
If your server is using PHP 8.5, update the fastcgi_pass directive in your Nginx server block from:
fastcgi_pass unix:/run/php/php8.x-fpm.sock;to:
fastcgi_pass unix:/run/php/php8.5-fpm.sock;Always ensure that the socket path in your Nginx configuration matches the PHP-FPM socket available on your server. Otherwise, Nginx won’t be able to communicate with PHP-FPM, and PHP pages may return a 502 Bad Gateway error.
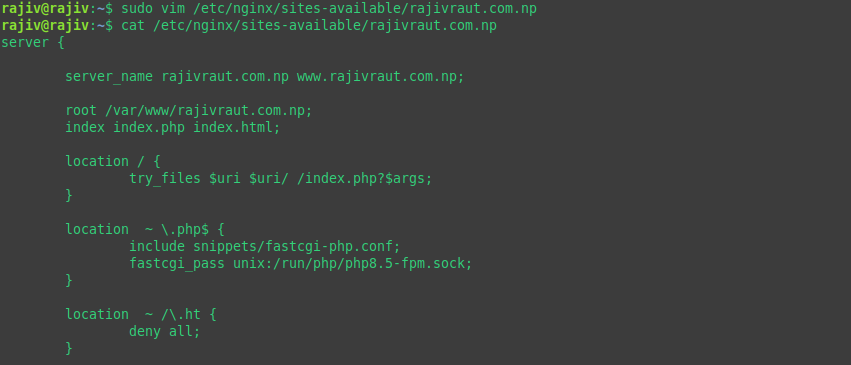
Once you’ve saved the file, enable the site by creating a symbolic link from the sites-available directory to sites-enabled:
sudo ln -s /etc/nginx/sites-available/example.com /etc/nginx/sites-enabled/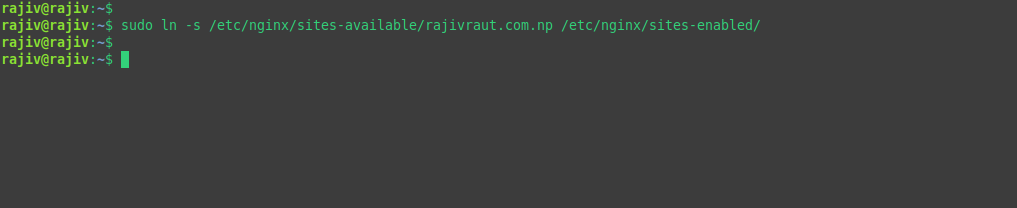
Before applying the new configuration, verify that there are no syntax errors:
sudo nginx -t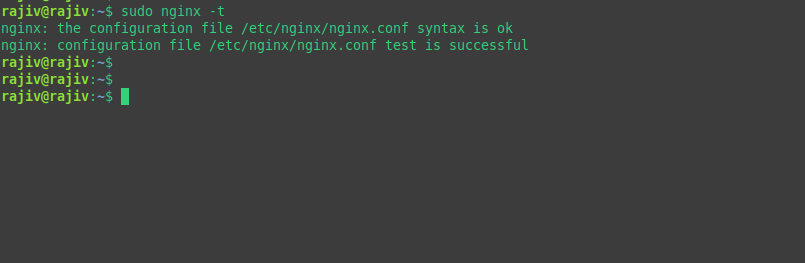
If the test reports that the configuration is successful, reload Nginx to apply the changes without interrupting active connections:
sudo systemctl reload nginx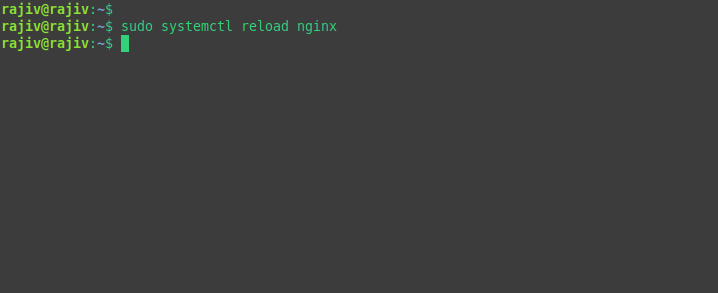
Understanding the Configuration
- listen 80; tells Nginx to listen for incoming HTTP requests on port 80.
- server_name specifies the domain names that this server block will respond to.
- root defines the location of your WordPress files.
- index sets the default files that Nginx should look for when a visitor accesses your site.
- location / uses the try_files directive to serve existing files when available and route all other requests to index.php, allowing WordPress permalinks to work correctly.
- location ~ \.php$ forwards PHP requests to PHP-FPM for processing.
- location ~ /\.ht blocks access to hidden .ht files. Although Nginx doesn’t use .htaccess, denying access provides an additional layer of security if such files exist.
At this point, Nginx is configured to serve your WordPress website and process PHP requests through PHP-FPM.
Point Your Domain to the Server
Create DNS A records
Before visitors can access your WordPress website, your domain must point to your server’s public IP address. This is done by creating DNS A records at your domain registrar or DNS provider.
Create the following DNS records:
| Host | Type | Points to |
| @ | A | 157.114.xx.xx |
| www | A | 157.114.xx.xx |


The @ record points your root domain (for example, example.com) to your server, while the www record ensures that www.example.com also resolves to the same server.
After saving the changes, allow some time for DNS propagation. Although updates often take effect within a few minutes, global propagation can take anywhere from a few minutes to 24–48 hours, depending on your DNS provider and caching.
Once propagation is complete, visiting your domain should load your WordPress website hosted on your Ubuntu server.
Note: If you’re using a CDN or DNS proxy service such as Cloudflare, make sure your DNS records point to your server’s correct public IP address. After the DNS records have propagated, you can proceed with issuing your Let’s Encrypt SSL certificate using Certbot.
Configure WordPress
Complete the WordPress Installation
With your server configured, you’re ready to complete the WordPress installation through the web-based setup wizard.
Open your domain in a web browser:
Or
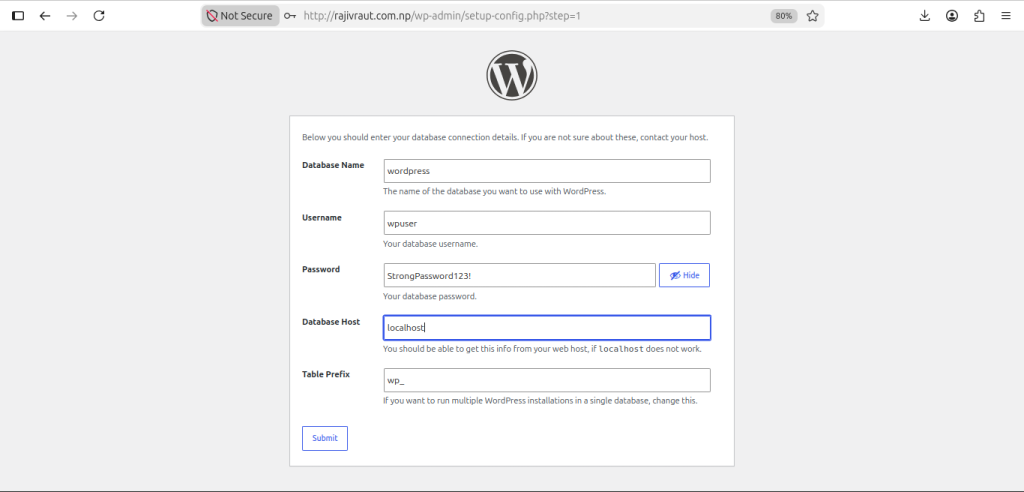
http://example.com/wp-admin/setup-config.php
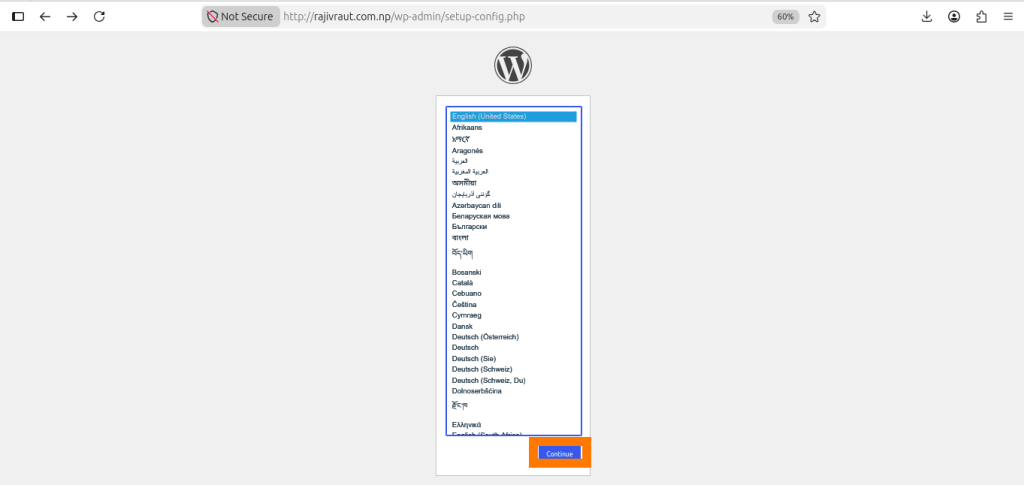
Replace example.com with your own domain name or the server’s IP address if you’re installing WordPress before pointing to your domain.
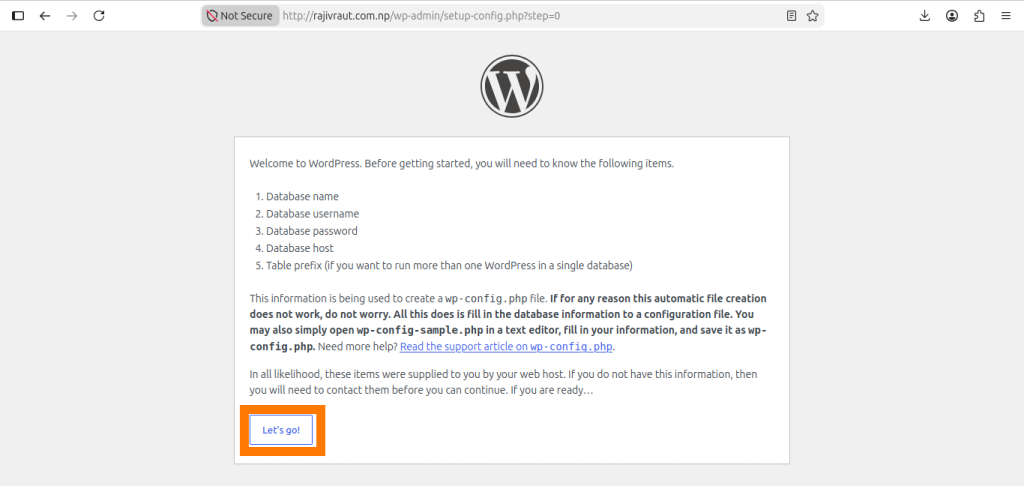
The WordPress installation wizard will guide you through the final configuration by asking for the following information:
- Database Name – The name of the database you created (for example, wordpress).
- Username – The MariaDB user created specifically for WordPress (for example, wpuser).
- Password – The password assigned to the database user.
- Database Host – Typically localhost for a local MariaDB installation.
- Table Prefix – The default is wp_, although using a custom prefix can provide a small security benefit.
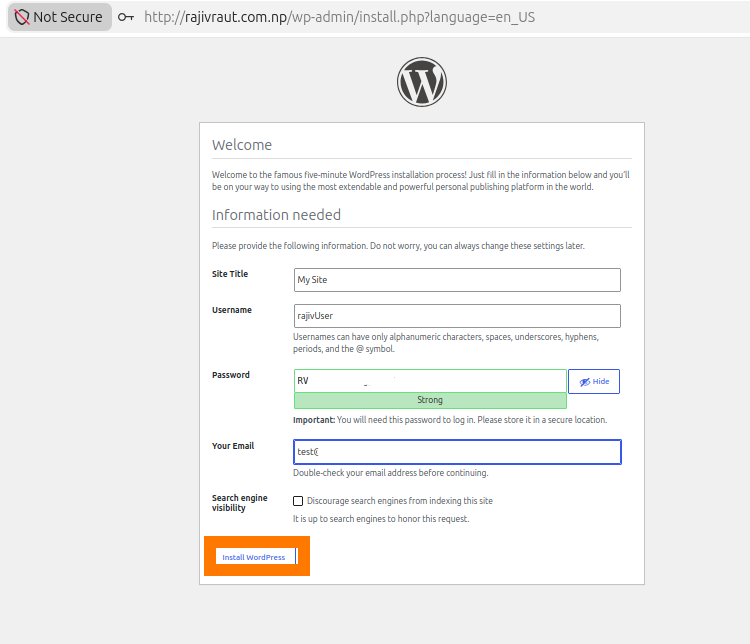
- Site Title – The name of your website.
- Administrator Username – The username for your WordPress administrator account.
- Administrator Password – Choose a strong, unique password.
- Administrator Email Address – Used for password recovery and important site notifications.
After entering the required information, click Install WordPress. WordPress will automatically create the necessary database tables and configure your website.
Once the installation is complete, you can sign in to the WordPress Dashboard using the administrator credentials you just created.
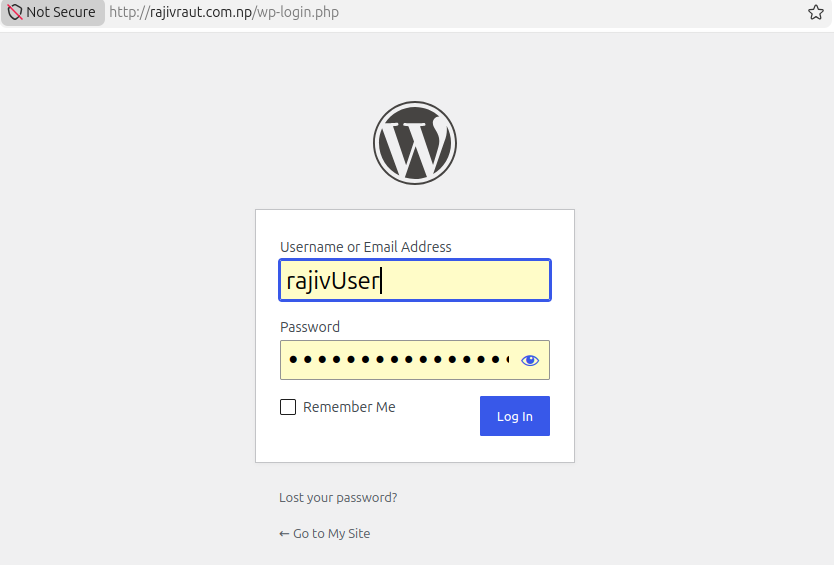
By default, the WordPress admin area is available at:
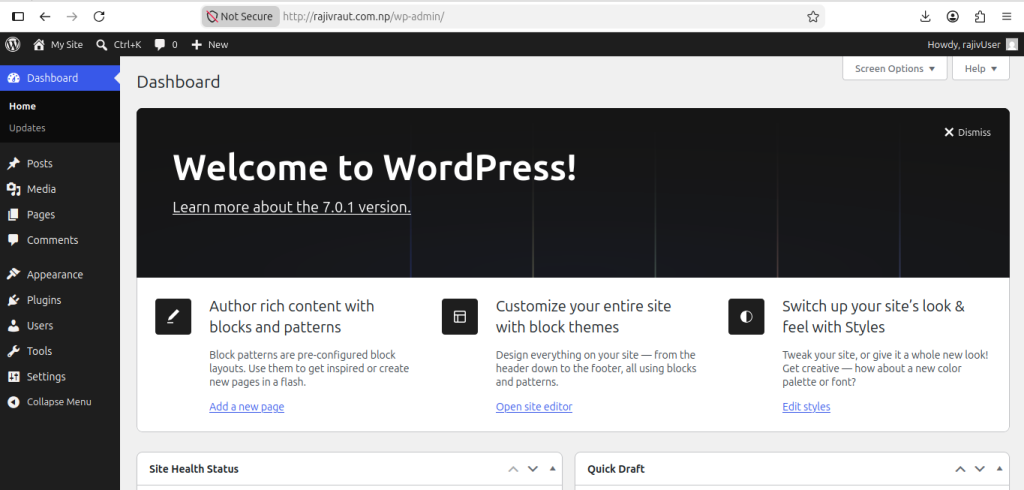
From the dashboard, you can begin customizing your site by installing themes, adding plugins, creating pages, and publishing content.
Configure SSL Certificate
Enable HTTPS with Let’s Encrypt
Serving your website over HTTPS is essential for protecting user data, improving search engine rankings, and eliminating browser warnings about insecure connections. With Certbot, you can obtain and install a free SSL/TLS certificate from Let’s Encrypt in just a few steps.
First, install Certbot and its Nginx plugin:
sudo apt install certbot python3-certbot-nginx -y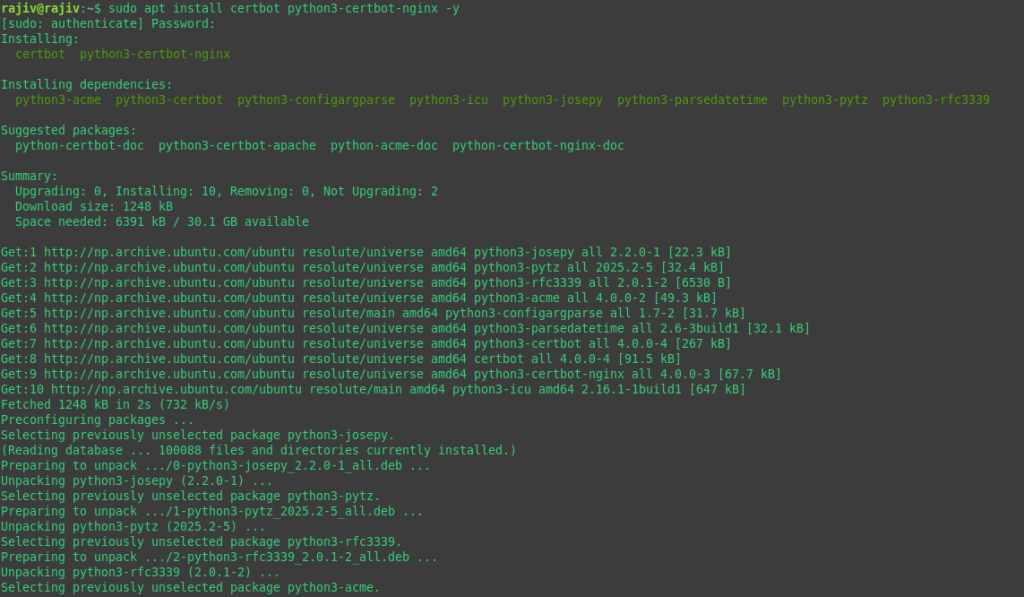
Next, request and install an SSL certificate for your domain. Replace example.com with your own domain name:
sudo certbot --nginx -d example.com -d www.example.com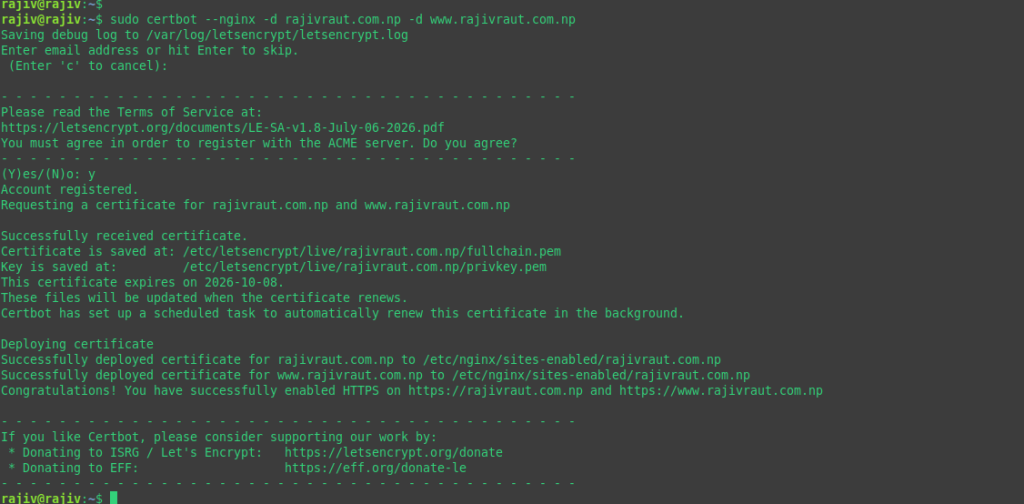
During the process, Certbot will verify your domain ownership, obtain a certificate from Let’s Encrypt, and automatically update your Nginx configuration. You’ll also be given the option to redirect all HTTP traffic to HTTPS, which is recommended for most websites.
After the certificate has been installed, verify that automatic certificate renewal is working correctly:
sudo certbot renew --dry-run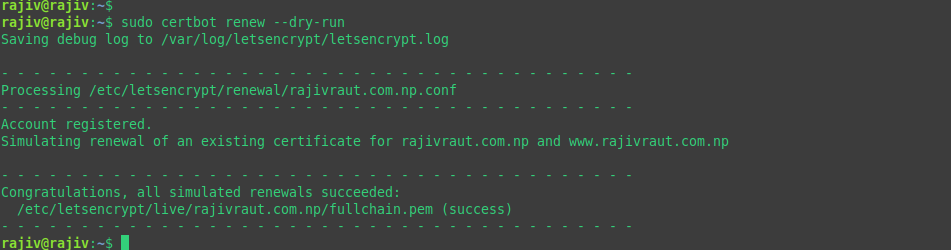
A successful dry run confirms that your server is able to renew certificates automatically before they expire. Since Let’s Encrypt certificates are valid for 90 days, automatic renewal helps ensure your website remains secure without requiring manual intervention.
Once the process is complete, your website should be accessible securely at:
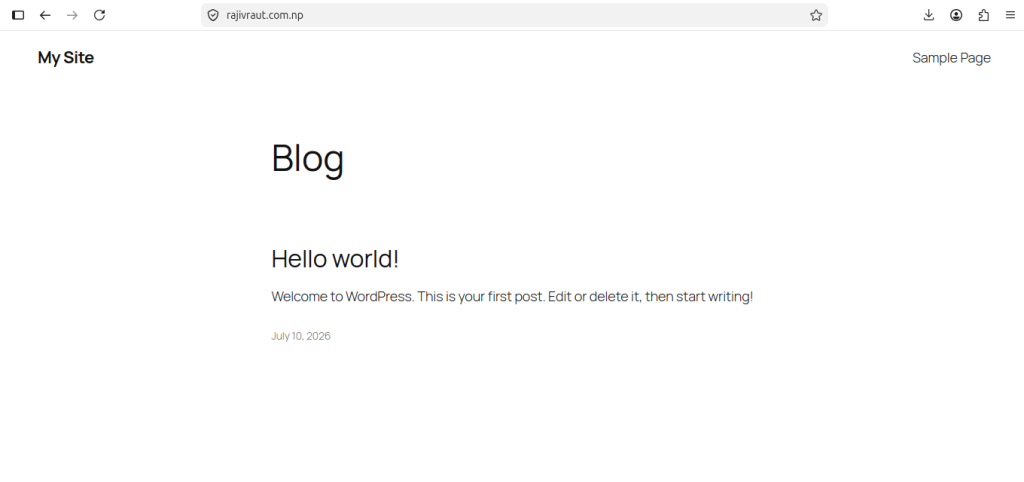
Note: Before requesting an SSL certificate, ensure your domain’s DNS records are pointing to your server’s public IP address and that ports 80 (HTTP) and 443 (HTTPS) are open in your firewall. Let’s Encrypt must be able to reach your server to validate domain ownership and issue the certificate.
Configure the Firewall
Adding Firewall Rules
A properly configured firewall helps protect your server by allowing only the network traffic your website actually needs.
Ubuntu includes UFW (Uncomplicated Firewall), which provides an easy way to manage firewall rules.
First, check the available application profiles:
sudo ufw app listYou should see profiles similar to:
Available applications:
  Nginx Full
  Nginx HTTP
  Nginx HTTPS
  OpenSSH
Allow SSH connections so you don’t lock yourself out of the server:
sudo ufw allow OpenSSHIf you want your website to be accessible over both HTTP and HTTPS, allow the Nginx Full profile:
sudo ufw allow 'Nginx Full'Alternatively, you can allow only HTTP or HTTPS individually:
sudo ufw allow 'Nginx HTTP'
sudo ufw allow 'Nginx HTTPS'
Enable the firewall:
sudo ufw enableFinally, verify that the firewall is active and the correct rules have been applied:
sudo ufw statusA typical output will look similar to:
Status: active

To                     Action      	From
----                   --------      --------
OpenSSH                ALLOW         Anywhere
Nginx Full             ALLOW         Anywhere
OpenSSH (v6)           ALLOW         Anywhere (v6)
Nginx Full (v6)        ALLOW         Anywhere (v6)
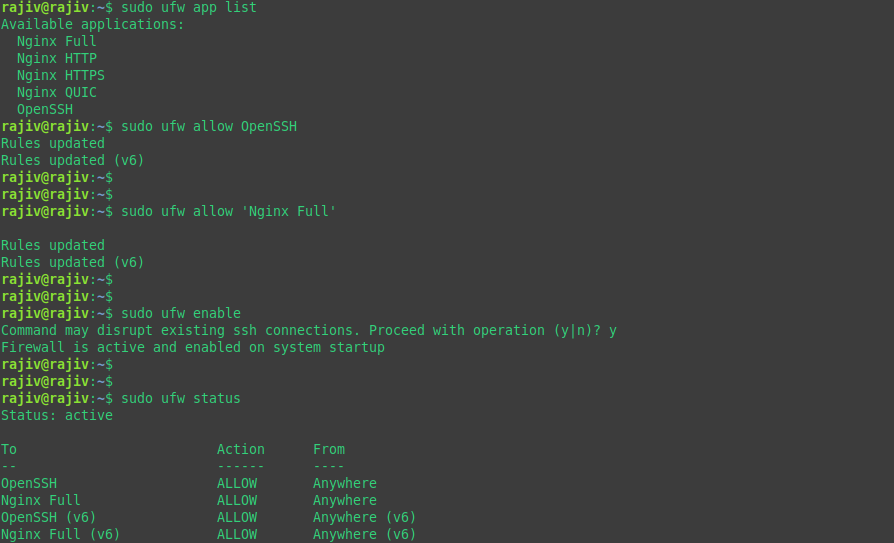
With these rules in place, your server will accept SSH connections for administration and allow web traffic over ports 80 (HTTP) and 443 (HTTPS) while blocking unsolicited traffic to other ports.
Post-Installation Optimization
With WordPress successfully installed, it’s worth spending a few minutes on some basic optimizations. These small changes can improve your site’s security, performance, and overall reliability.
WordPress Security
A secure WordPress installation starts with following a few essential best practices:
- Disable the built-in file editor to prevent administrators from editing plugin and theme files directly through the WordPress dashboard. If an administrator account is ever compromised, this helps reduce the potential impact.
- Use strong, unique passwords for all WordPress, database, and hosting accounts. Consider enabling two-factor authentication (2FA) for administrator accounts whenever possible.
- Keep WordPress, themes, and plugins up to date. Many security vulnerabilities are discovered in outdated software, so applying updates promptly is one of the most effective ways to protect your website.
Nginx Optimization
Optimizing your Nginx configuration can noticeably improve website performance and reduce server load.
- Enable Gzip compression to reduce the size of HTML, CSS, JavaScript, and other text-based files before they’re sent to visitors’ browsers.
- Configure browser caching for static assets such as images, stylesheets, JavaScript files, and fonts. This allows returning visitors to load your website faster by reusing previously downloaded files.
- Hide the Nginx version information by disabling server tokens. This prevents your server from advertising the exact version of Nginx you’re running, providing a small but worthwhile security improvement.
PHP Optimization
Fine-tuning PHP helps WordPress perform better, particularly on larger websites or those using feature-rich themes and plugins.
- Increase the upload size limits if you expect to upload large images, videos, or theme and plugin packages.
- Adjust the PHP memory limit to provide sufficient memory for WordPress and resource-intensive plugins, helping prevent memory exhaustion errors during updates or complex operations.
- Review other PHP settings, such as execution time and input limits, to ensure they align with your website’s requirements.
Implementing these optimizations provides a solid foundation for a faster, more secure, and more reliable WordPress installation. As your website grows, you can further enhance performance with object caching, a Content Delivery Network (CDN), and regular performance monitoring.
Troubleshooting
Even with a straightforward installation, it’s possible to encounter a few issues. Below are some of the most common problems when deploying WordPress with Nginx, PHP-FPM, and MariaDB, along with steps to diagnose and resolve them.
502 Bad Gateway
A 502 Bad Gateway error typically indicates that Nginx is unable to communicate with PHP-FPM.
Common causes include:
- The PHP-FPM service is not running.
- The fastcgi_pass socket configured in the Nginx server block does not match the PHP-FPM socket available on your system.
Check the status of the PHP-FPM service by running:
systemctl status php*-fpmIf the service is inactive, start it and verify that the socket path specified in your Nginx configuration matches the socket located in the /run/php/ directory.
Database Connection Error
If WordPress displays an “Error Establishing a Database Connection” message, the issue is usually related to the database configuration.
Begin by verifying that the database credentials are correct:
mysql -u wpuser -pIf you’re able to log in successfully, confirm that the following values in your WordPress configuration match the database you created:
- Database name
- Database username
- Database password
- Database host (typically localhost)
If any of these values are incorrect, update them in the wp-config.php file and try again.
Permission Denied
File permission issues can prevent WordPress from uploading media, installing plugins, or updating themes.
To restore the correct ownership of your WordPress files, run:
sudo chown -R www-data:www-data /var/www/example.comIf the problem persists, verify that your directory permissions are set to 755 and your file permissions are set to 644, as configured earlier in this guide.
Nginx Configuration Errors
If Nginx fails to restart or reload after editing the server block, test the configuration for syntax errors:
sudo nginx -tCorrect any reported errors before reloading the service.
SSL Certificate Issues
If Certbot cannot issue a certificate, verify that:
- Your domain’s DNS records point to the correct server IP address.
- Ports 80 (HTTP) and 443 (HTTPS) are open.
- Your domain has finished DNS propagation.
You can also test certificate renewal with:
sudo certbot renew --dry-runReviewing these common issues should help resolve the majority of installation problems and get your WordPress site running successfully.
Conclusion
Congratulations! You’ve successfully installed and configured WordPress on Ubuntu 26.04 using Nginx, PHP-FPM, and MariaDB. Along the way, you’ve prepared the server, configured the database, installed the required PHP components, secured your site with HTTPS, and applied recommended permissions and security settings.
This stack is lightweight, reliable, and well-suited for both small personal websites and high-traffic production environments. With Nginx handling web requests, PHP-FPM processing dynamic content, and MariaDB managing your data, you have a solid foundation for hosting a fast and secure WordPress website.
From here, you can start customizing your site by installing a theme, adding plugins, creating pages and posts, and configuring additional features to suit your needs. As your website grows, remember to keep WordPress, themes, plugins, and your server packages up to date, perform regular backups, and monitor your server to maintain optimal performance and security.